User Tools
This is an old revision of the document!
Table of Contents
Creating and Managing Classic API Credentials
When calling PayPal Classic APIs, you must authenticate each request using a set of API credentials. PayPal associates a set of API credentials with a specific PayPal account, and you can generate credentials for any PayPal Business or Premier account.
This guide describes how to create the credentials you need to make calls to the live PayPal environment. For generating and using credentials for testing in the Sandbox, see Testing Classic API Calls.
Contents
Credential types
The Classic APIs support two different types of credentials:
- Signature API credentials
- Certificate API credentials
Each credential set contains three credential values:
| Credential Set | Credential Names |
|---|---|
| Signature set |
* API Username
- API Password
- Signature
|Certificate set |
- API Username
- API Password
- Certificate
While you can use either set to authenticate requests to the Classic API platform, for security reasons, PayPal recommends you use Certificate credentials. For more on Certificate credentials, see Managing Certificate Credentials.
Note: You authenticate calls to the Adaptive APIs (Adaptive Accounts, Adaptive Payments, the Invoicing service, and the Permissions service) using these same credentials. However, all Adaptive platform APIs require that you also supply an appID in addition to your Signature or Certificate credential values.
Creating Classic API credentials
Create your live Classic API credentials from the PayPal.com site as follows:
1. Log in to PayPal.com
You must have a PayPal Business account to make calls to the live PayPal servers. Log in to your Business account on the following page: https://www.paypal.com.
2. Navigate to the API Access page
Click the profile (person) icon in the top right and select Profile and Settings from the drop-down menu. Then navigate to My Selling Tools > API Access and click Update.
Note If you do not see the profile (person) icon in the top right, navigate to the API Access page by clicking My Account > Profile > My Selling Tools > API Access.
3. Generate the Certificate set
Click Request API Credentials on the API Access page:
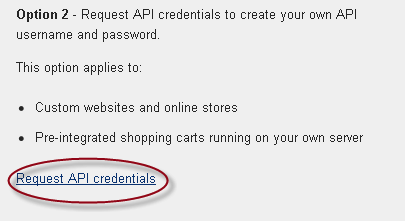
Note: If you’ve already generated a set of API credentials, you’ll have to delete your existing set before you can generate a new set of credentials.
Select Request API signature and click Agree and Submit to generate a set of Signature credentials.
Here’s an example showing a set of Signature credentials (for Certificate credentials, see the section below):

Managing certificate credentials
Certificate credentials are much like the Signature credentials described above, however there are differences in the way that you generate and use the credentials.
Note: If your API Certificate is expiring, skip ahead to Renewing an API Certificate.
You create an API Certificate much like create Signature credentials. The steps below describe the differences:
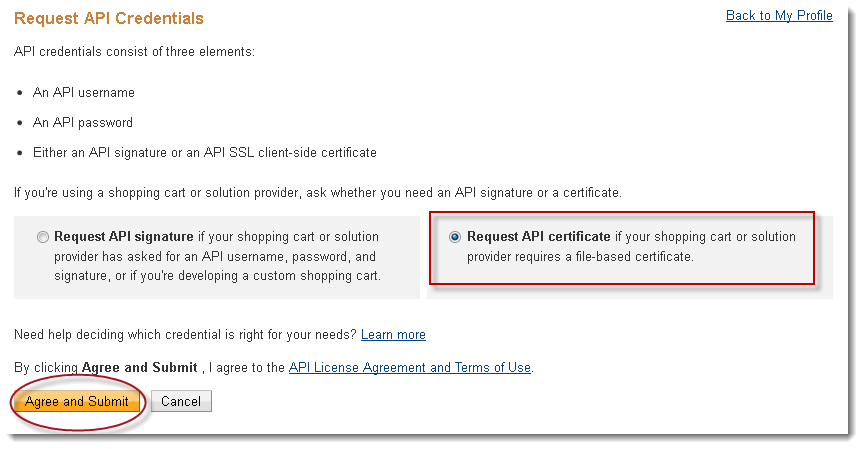
On the Request API Credentials page, select the Request API Certificate radio button, then click the Agree and Submit button (see Step 3 above for more details).
The Download or Remove API Certificate page displays.
Click Download Certificate.
The certificate is downloaded to a file named cert_key_perm.txt. Be sure to save the file to a secure location.
PayPal formats the API Certificate file in PEM format. The file contains both your public certificate and the associated private key. Although the PEM certificate is not human readable, the file is not encrypted.
Renewing an API certificate
An API Certificate is valid for 10 years after its creation date, after which it expires. To prevent an interruption in API services, you must renew your certificate before it expires.
The certificate renewal process generates a new certificate that you can install to replace any expiring certificate.
Log in to your PayPal account, and navigate to the Manage API Certificate page.
To do so, select My Account > Profile > My Selling Tools, click the Update (API Access) link, then click View API Certificate.
On the Manage API Certificate page, check the status of your API Certificate, whether it is Active or About to expire.
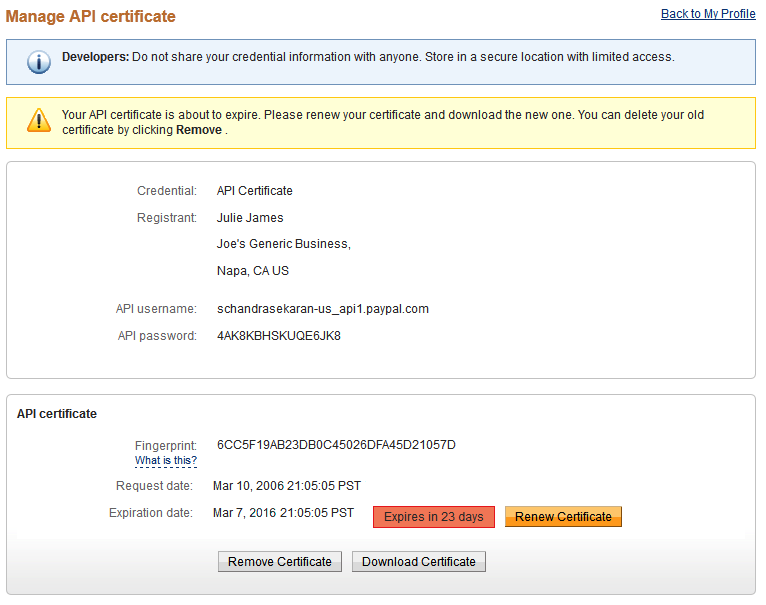
If the status of your certificate is About to expire, click the Renew certificate button.
An additional certificate is generated and given an Active status. Both the new and old certificates appear in the Manage API Certificate page.
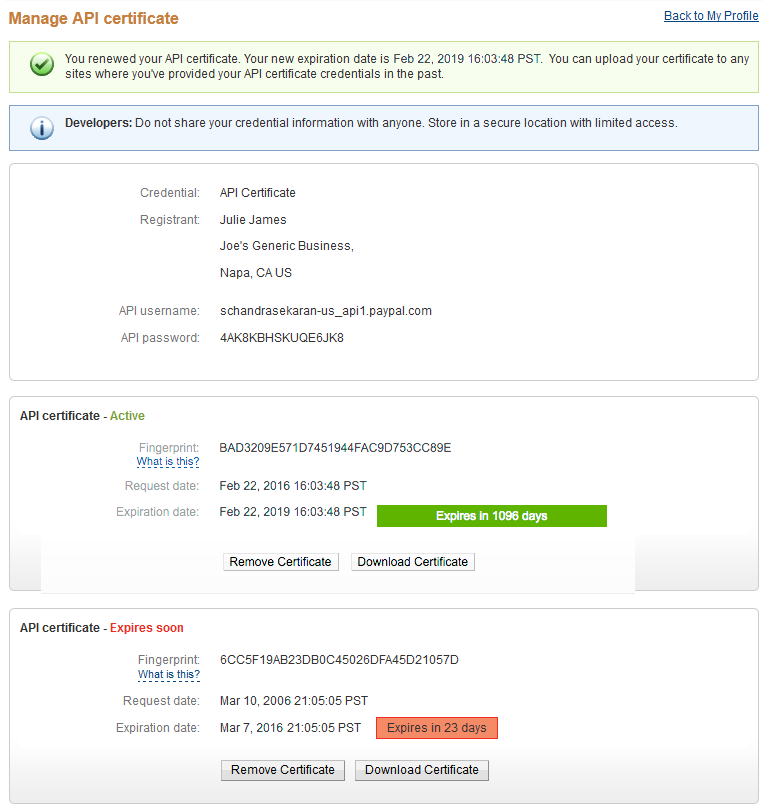
On the certificate marked as Active, click Download certificate and follow the steps in Managing Certificate Credentials for details on downloading and using the updated certificate.
After you’ve imported the new API Certificate, test your integration to ensure it works with the new certificate. Distribute your new API Certificate to all affected partners. Once the old certificate expires, remove it by clicking the Remove certificate button associated with the certificate.
Encrypting your certificate
The PayPal SDKs for Java, .NET, and Classic ASP require the additional step of encrypting the certificate into PKCS12 format before you can use it with the SDKs. (Note that the PayPal SDK for PHP does not require SSL encryption.)
Tip: If you do use encryption, be sure to encrypt both your Sandbox and your live API certificates.
The steps to encrypt your certificate require the OpenSSL encryption tool. While Unix users likely have this tool installed with their operating system, Windows users need to download OpenSSL. Accept the defaults to install OpenSSL.
Open a command prompt.
In Windows, select Start > Programs > Accessories > Command Prompt.
Ensure OpenSSL bin directory is in your system path. If it is not, add it to your path.
Change directories to the location of the certificate you want to encrypt (cert_key_pem.txt) and execute the following command:
<prettyprint prettyprinted>
openssl pkcs12 -export -in cert_key_pem.txt -inkey cert_key_pem.txt -out paypal_cert.p12
</prettyprint>
Note: When encrypting a certificate, you’re prompted for a password that you use to decrypt the file. Enter a password at the Enter Export Password prompt and be sure to store it in a secure location.
The above process creates a file named ‘paypal_cert.p12’, your encrypted API certificate.
Installing the certificate for .NET or Classic ASP
If you’re using either the PayPal SDK for .NET or the SDK for Classic ASP, you need to install the encrypted certificate.
If you’re developing with the PayPal SDK for .NET, Windows requires you to import the certificate into the Windows Certificate Store and grant access to your private key to the user executing your web application. Microsoft provides a utility that accomplishes these tasks in a single command. The utility, called the Windows HTTP Services Certificate Configuration Tool (or WinHttpCertCfg.exe) is freely available from Microsoft.
To use the utility, you need Administrator rights. Enter the following command at a command prompt, and make the appropriate replacements as described below:
<prettyprint prettyprinted>
WinHttpCertCfg -i \<paypal_cert.p12> -p \<privateKeyPassword> -c LOCAL_MACHINE\my -a \<userName>
</prettyprint>
- Replace <paypal_cert.p12> with the name of PKCS12 Encrypted API Certificate you previously generated.
- Replace <privateKeyPassword> with the password you used to encrypt the certificate.
- Replace <userName> with the name of the user executing your application.
- For an ASP.NET application, this value is ASPNET.
- Under Windows IIS 5 (default configuration), this value is IWAM_, where is the appropriate computer name.
- Under Windows IIS 6 (default configuration), this value is “NETWORK SERVICE” (make sure to include the quotation marks).
